System and File Preparations
This article describes how to install Oracle 12c 64bit database on Ubuntu 16.04 64bit.
Download software
Download the Oracle software from OTN or MOS or get a downloaded zip file.
- OTN: Oracle Database 12c Release 1 (12.1.0.2) Software (64-bit).
- edelivery: Oracle Database 12c Release 1 (12.1.0.2) Software (64-bit)
Unpacking
You should have following two files downloaded now.
linuxamd64_12102_database_1of2.zip
linuxamd64_12102_database_2of2.zip
Unzip and copy them to
\tmp\databases
NOTE: you might have to merge two unzipped folders to create a single folder.
Create new groups and users
Open a terminal and execute following commands. you might need root permission.
groupadd -g 502 oinstall
groupadd -g 503 dba
groupadd -g 504 oper
groupadd -g 505 asmadmin
Now create the oracle user
useradd -u 502 -g oinstall -G dba,asmadmin,oper -s /bin/bash -m oracle
You will prompt to set to password. set a momorable password and write it down.
(mine is oracle)
Install required packages
Lets set Ubuntu Extra Packages Repo for
- libpthread-stubs0
- libmotif4
- libtiffxx5
echo 'deb http://cz.archive.ubuntu.com/ubuntu precise main universe' >> /etc/apt/sources.list.d/extra.list
apt-get update
Now execute this script to install all required packages.
apt-get install alien autoconf automake autotools-dev binutils doxygen \
elfutils expat gawk gcc gcc-multilib g++-multilib libstdc++6:i386 ksh less libtiff5 \
libtiff5-dev lib32z1 libaio1 libaio-dev libc6-dev libc6-dev-i386 libc6-i386 \
libelf-dev libltdl-dev libmotif4 libodbcinstq4-1 libodbcinstq4-1:i386 \
libpthread-stubs0 libpth-dev libstdc++5 lsb-cxx make \
pdksh openssh-server rlwrap rpm sysstat unixodbc unixodbc-dev x11-utils \
zlibc libglapi-mesa:i386 libglu1-mesa:i386 libqt4-opengl:i386 \
libpthread-workqueue0 libpthread-workqueue-dev libzthread-2.3-2 libzthread-dev \
libpthread-stubs0-dev libaio-dev
DB Directory Permissions
Lets set oinstall group to access oracle installation.
chown -R oracle:oinstall /tmp/database
Host file
Host file should contain the fully qualified name for the local server.
Open hosts file
cat /etc/hosts
It should have a record similar to following
127.0.0.1 localhost
Grant Connection to X Server
You need this step to load installation UI as oracle user
Test the x server
xclock
If you see a clock running you are good to go
Now run
xhost
Result should be
xhost SI:localuser:nuwan
(nuwan is my user name)
Now let oracle user to access xhost
xhost +SI:localuser:oracle
Symlinks to Binaries and Libraries
Linking Binaries
ln -s /usr/bin/awk /bin/awk
ln -s /usr/bin/rpm /bin/rpm
ln -s /usr/bin/basename /bin/basename
Linking Libraries
ln -s /usr/lib/x86_64-linux-gnu /usr/lib64
cd /lib64
ln -s /lib/x86_64-linux-gnu/libgcc_s.so.1 .
Make Target Directories
mkdir -p /u01/app/oracle/product/12/dbhome_1
chown -R oracle:oinstall /u01
chmod -R 775 /u01
Setup configuration parameters
Add Oracle 12c Kernel Parameters
Open
nano /etc/sysctl.conf
Add to the end of the file
#### Oracle 12c Kernel Parameters ####
fs.suid_dumpable = 1
fs.aio-max-nr = 1048576
fs.file-max = 6815744
kernel.shmall = 2097152
kernel.shmmax = 536870912
kernel.shmmni = 4096
# semaphores: semmsl, semmns, semopm, semmni
kernel.sem = 250 32000 100 128
net.ipv4.ip_local_port_range = 9000 65500
net.core.rmem_default=4194304
net.core.rmem_max=4194304
net.core.wmem_default=262144
net.core.wmem_max=1048586
Oracle User Settings 4 Oracle 12c
nano /etc/security/limits.conf
#Add the following lines
#### oracle User Settings 4 Oracle 12c ####
oracle soft nproc 2047
oracle hard nproc 16384
oracle soft nofile 1024
oracle hard nofile 65536
oracle soft stack 10240
Add Paths to oracle’s .bashrc
Login as Oracle
su oracle
Edit .bashrc file
nano ~/.bashrc
Insert:
# Oracle Settings
TMP=/tmp;
export TMP TMPDIR=$TMP;
export TMPDIR ORACLE_HOSTNAME=127.0.0.1;
export ORACLE_HOSTNAME
ORACLE_UNQNAME=DB12C;
export ORACLE_UNQNAME
ORACLE_BASE=/u01/app/oracle;
export ORACLE_BASE
ORACLE_HOME=$ORACLE_BASE/product/12/dbhome_1;
export ORACLE_HOME
ORACLE_SID=SID;
export ORACLE_SID
PATH=/usr/sbin:$PATH;
export PATH
PATH=$ORACLE_HOME/bin:$PATH;
export PATH
LD_LIBRARY_PATH=$ORACLE_HOME/lib:/lib:/usr/lib:/usr/lib64;
export LD_LIBRARY_PATH
CLASSPATH=$ORACLE_HOME/jlib:$ORACLE_HOME/rdbms/jlib;
export CLASSPATH
Installation
Load the New Kernel Parameters.
/sbin/sysctl -p
Load New .bashrc Settingssource ~/.bashrc
Installationchmod -R +x /tmp/database
/tmp/database/runInstaller
UI Steps
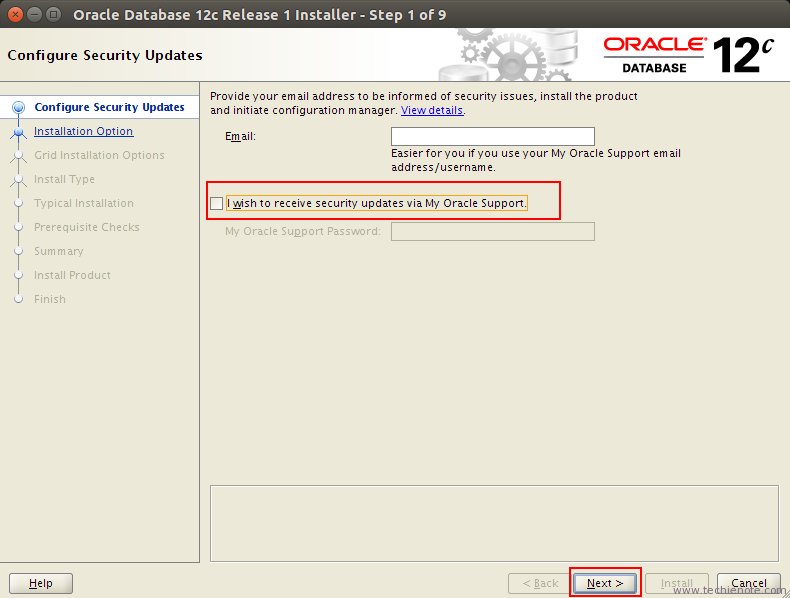
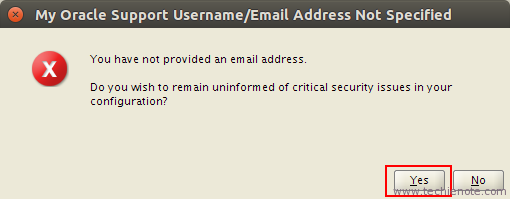
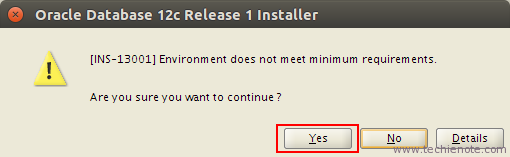
Configure Security Updates--next
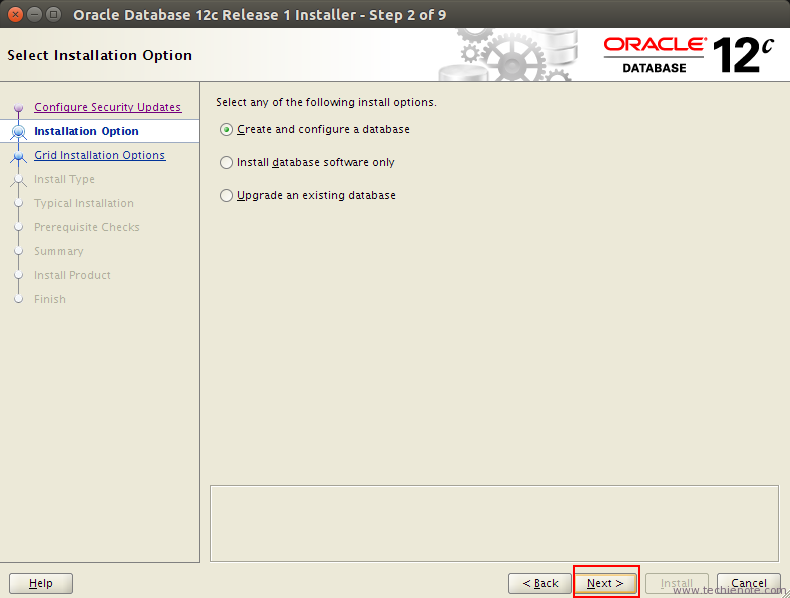
--create and configure db
--next
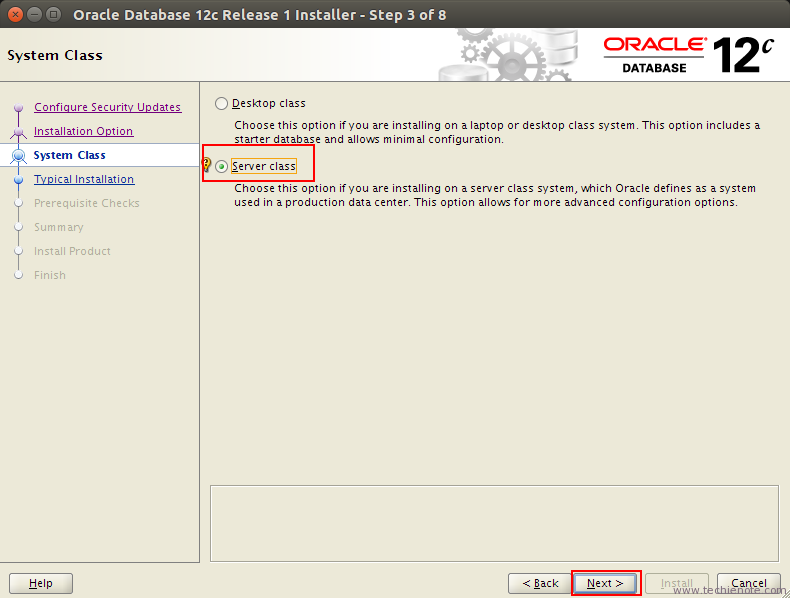
--server class
--next
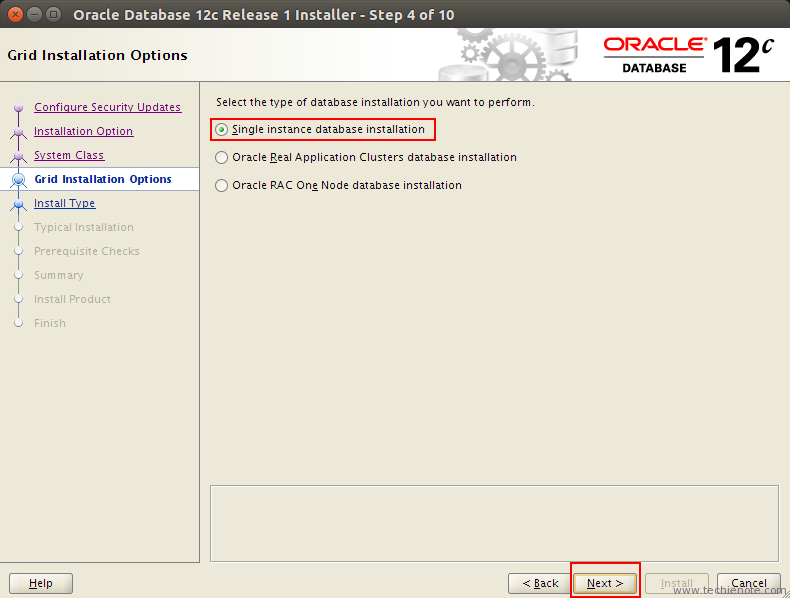
--single instance
--next
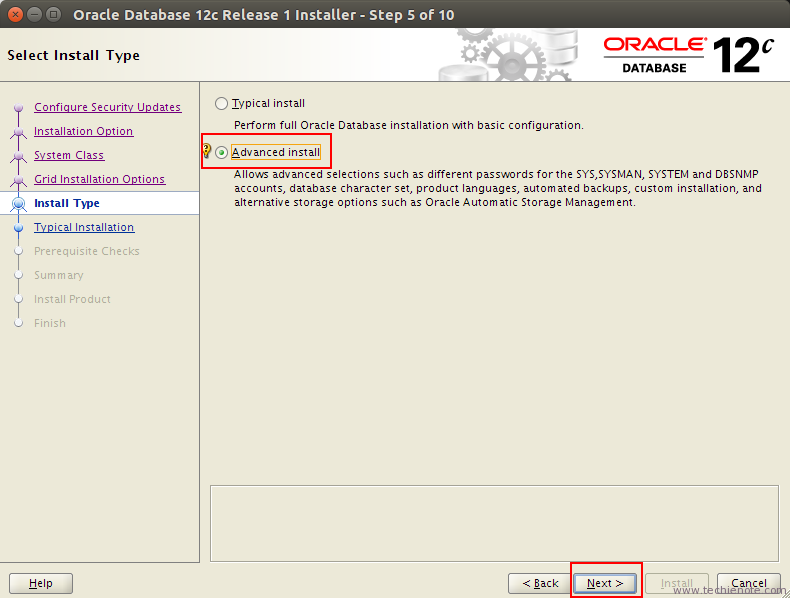
--advance install
--next
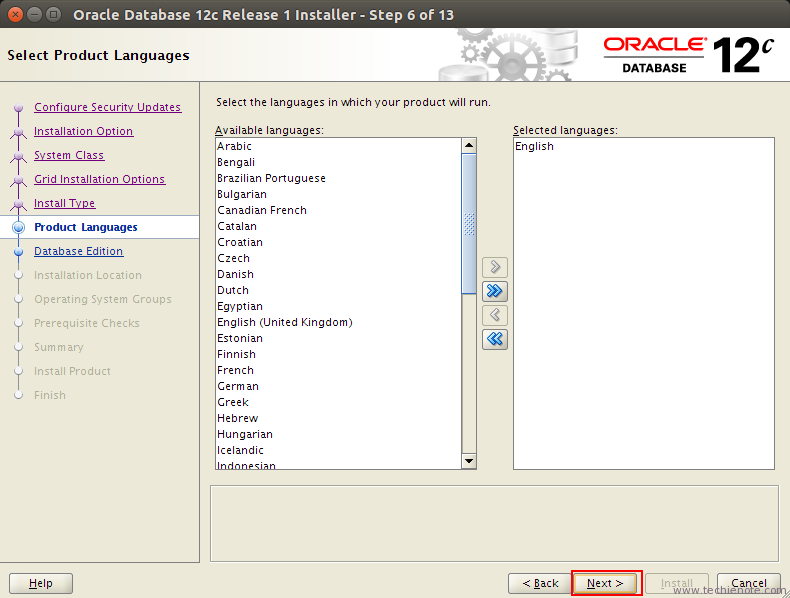
--engish
--next
--standard edition one
--next
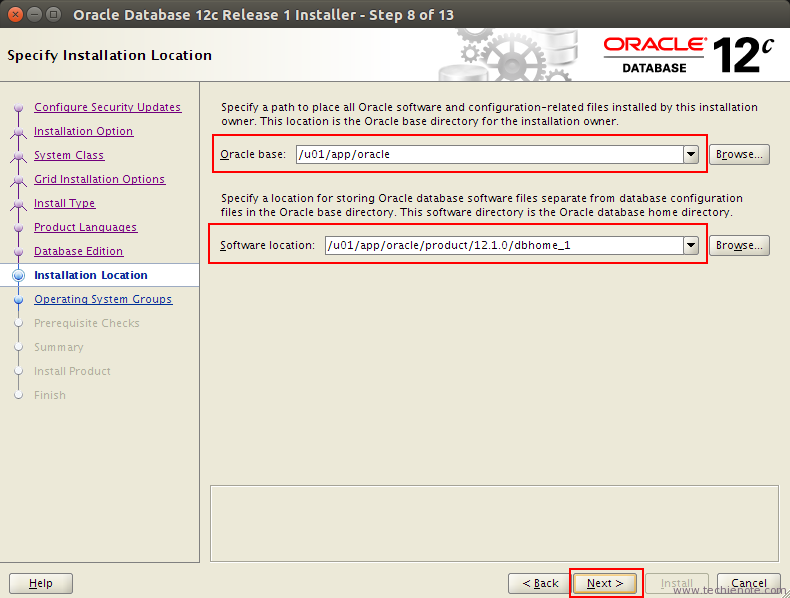
Installation location
--no change
--ORACCLE_BASE /u01/app/oracle
--software location /u01/app/oracle/product/12/dbhome_1
--next
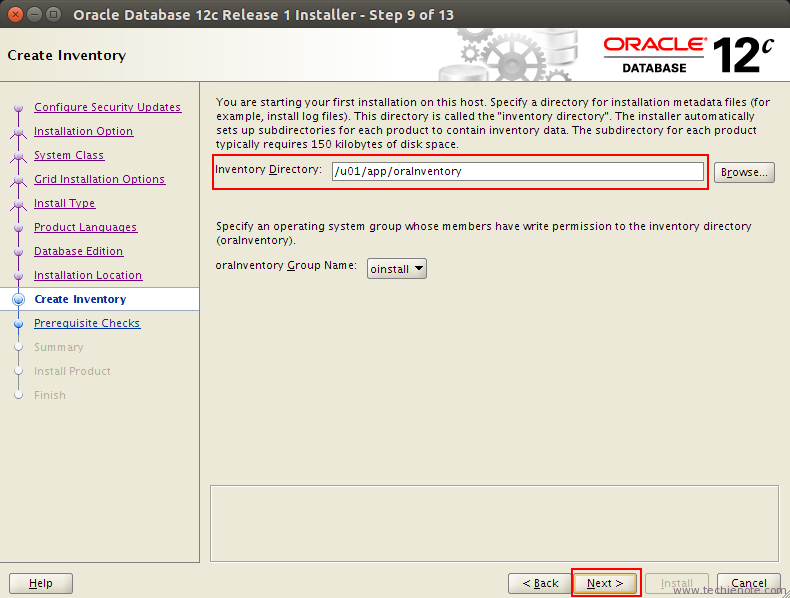
--no change
--inventry directory /u01/app/oraInventory
--next
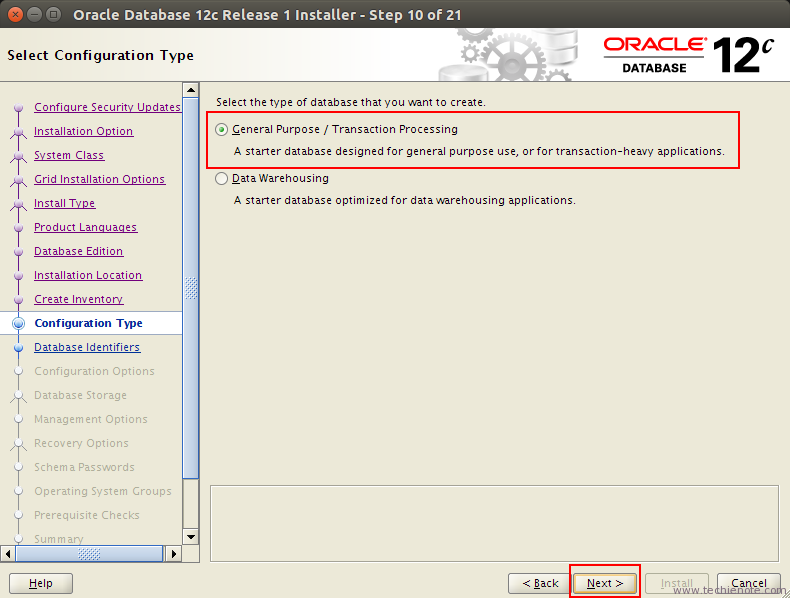
--no change
--general purpose
--next
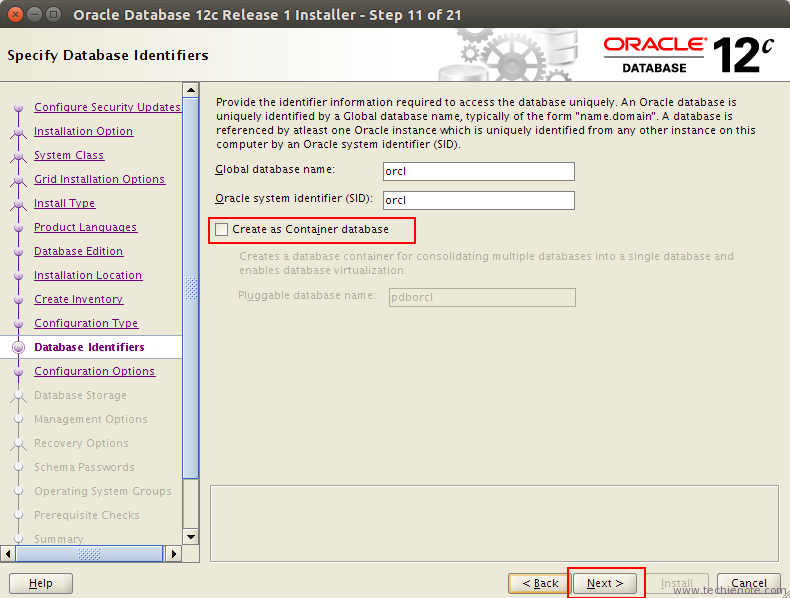
--note
--global database name - orcl
--oracle system identifier SID - SID
--unchecked Create as Container database option
--next
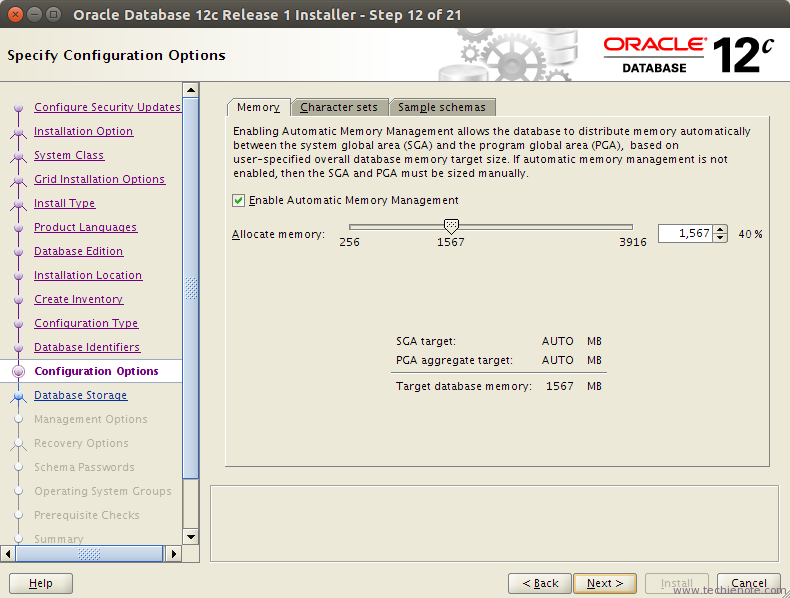
--note
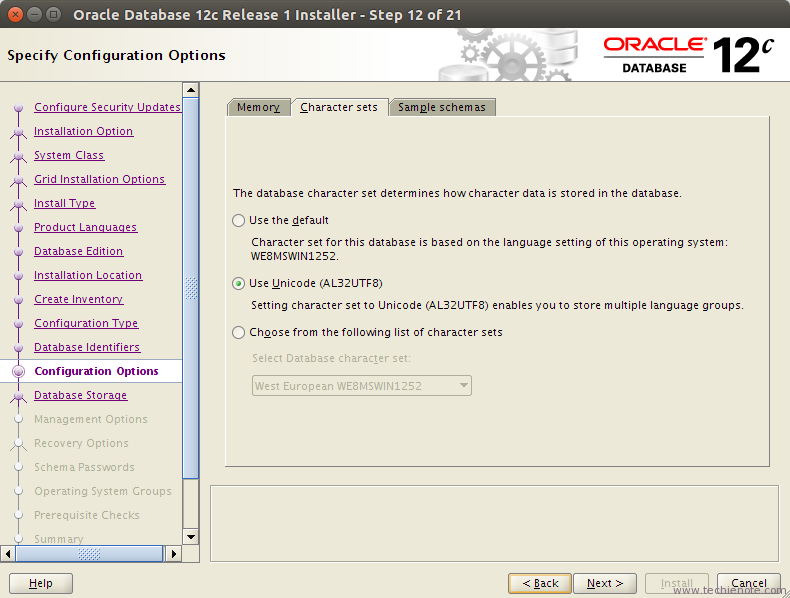
-- Enable Automatic Memory Management: TRUE
--defoult charset
--next
--note
--database file location - /u01/app/oracle/oradata
--next
--next
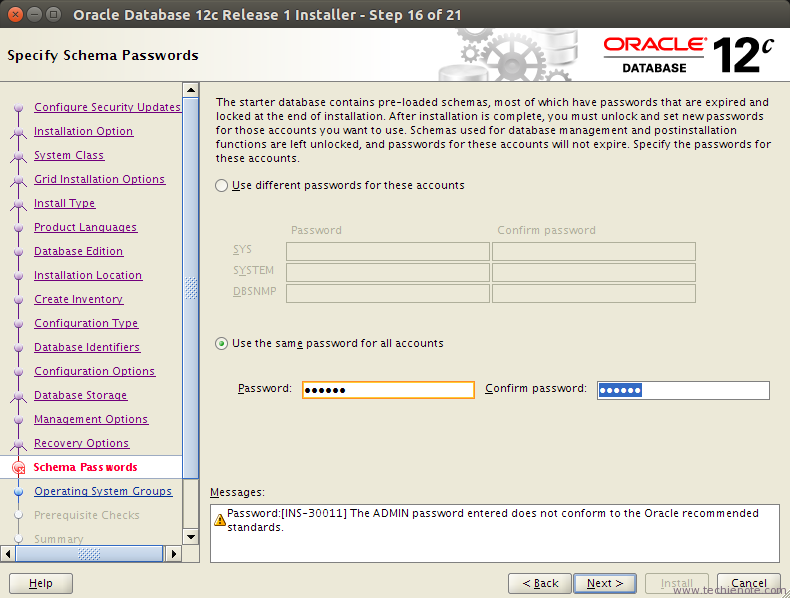
--select : Use the same password for all accounts
--SYS,SYSTEM,DBSNMP
--PWD: nuwan
--next

--next
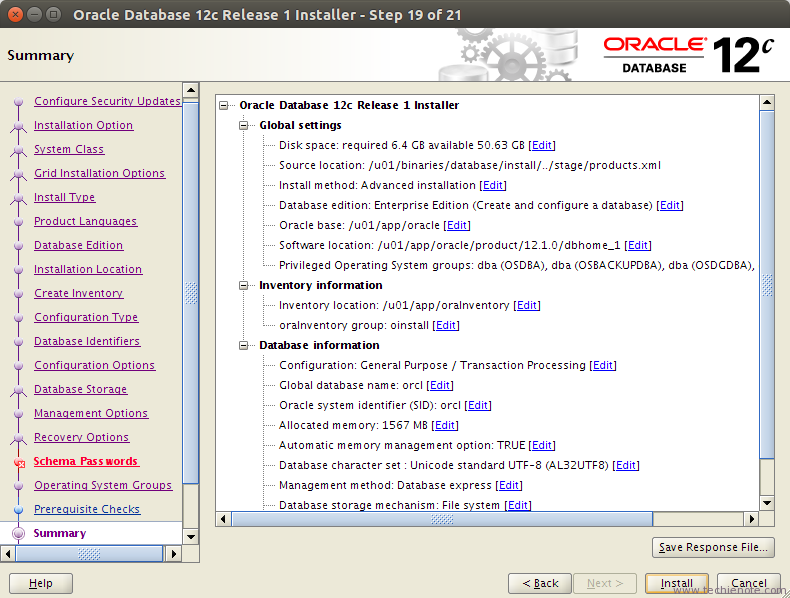
-- save response file
--install
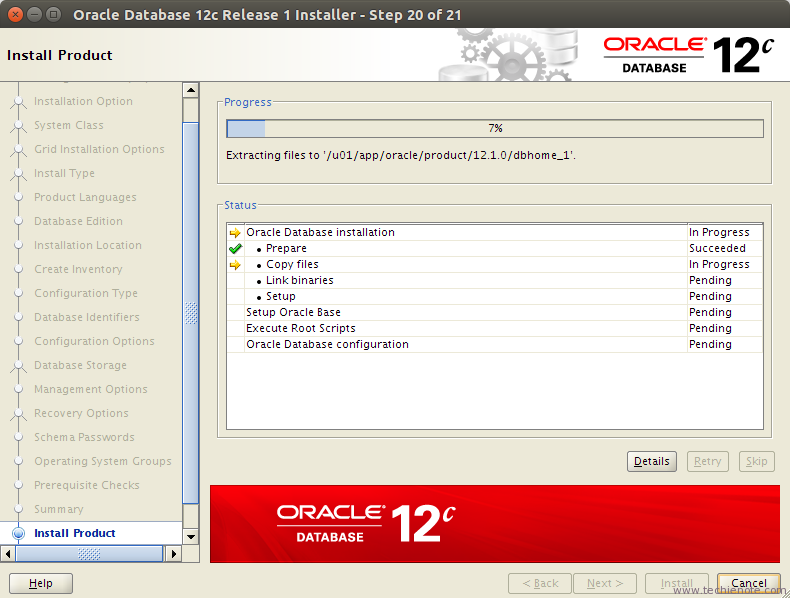
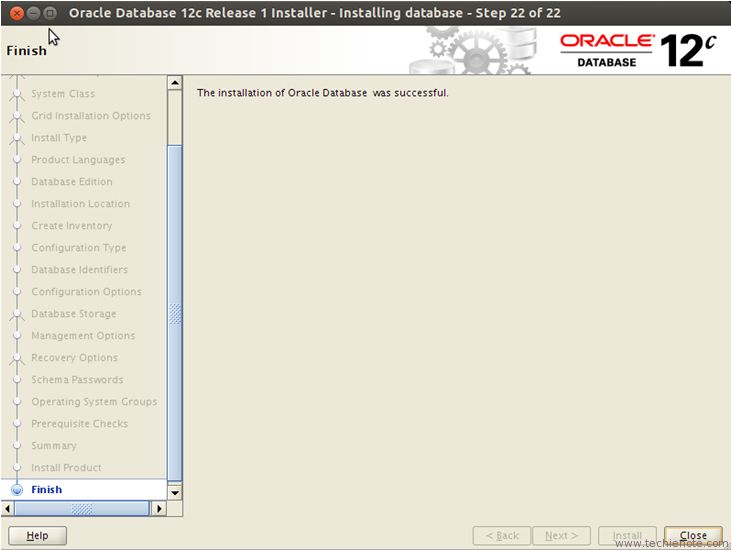
Installation Begins
Troubleshooting
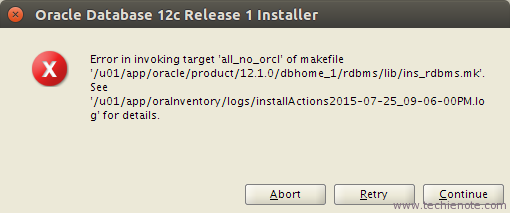
Issue: links proc gen_pcscfg procob issue#in a new terminal
su oracle
rm -rf $ORACLE_HOME/lib/stubs/
nano $ORACLE_HOME/rdbms/lib/env_rdbms.mk
LINKTTLIBS=$(LLIBCLNTSH) $(ORACLETTLIBS) $(LINKLDLIBS)
LINK=$(FORT_CMD) $(PURECMDS) $(ORALD) $(LDFLAGS) $(COMPSOBJS)
LINK32=$(FORT_CMD) $(PURECMDS) $(ORALD) $(LDFLAGS32) $(COMPSOBJS)
TG4PWD_LINKLINE= $(LINK) $(OPT) $(TG4PWDMAI) \
$(LLIBTHREAD) $(LLIBCLNTSH) $(LINKLDLIBS)
RMAN_LINKLINE=$(LINK) $(OPT) $(S0MAIN) $(SSKRMED) $(SKRMPT) \
$(LLIBDBTOOLS) $(LLIBCLIENT) $(LLIBSQL) $(LLIBPLSQL) \
$(LLIBSNLSRTL) $(LLIBUNLSRTL) $(LLIBNLSRTL) \
$(LLIBSLAX) $(LLIBPLSQL) $(LIBPLCN) $(LINKTTLIBS)
#to
LINKTTLIBS=$(LLIBCLNTSH) $(ORACLETTLIBS) $(LINKLDLIBS) -lons
LINK=$(FORT_CMD) $(PURECMDS) $(ORALD) $(LDFLAGS) $(COMPSOBJS) -Wl,--no-as-needed
LINK32=$(FORT_CMD) $(PURECMDS) $(ORALD) $(LDFLAGS32) $(COMPSOBJS) -Wl,--no-as-needed
TG4PWD_LINKLINE= $(LINK) $(OPT) $(TG4PWDMAI) \
$(LLIBTHREAD) $(LLIBCLNTSH) $(LINKLDLIBS) -lnnz12
RMAN_LINKLINE=$(LINK) $(OPT) $(S0MAIN) $(SSKRMED) $(SKRMPT) \
$(LLIBDBTOOLS) $(LLIBCLIENT) $(LLIBSQL) $(LLIBPLSQL) \
$(LLIBSNLSRTL) $(LLIBUNLSRTL) $(LLIBNLSRTL) \
$(LLIBSLAX) $(LLIBPLSQL) $(LIBPLCN) $(LINKTTLIBS) -lons
nano /u01/app/oracle/product/12/dbhome_1/network/lib/ins_net_server.mk
# change tnslsnr: $(S0NSGL) $(SNSGLP) $(NSGLPNP)
$(SILENT)$(ECHO) " - Linking $(TNSLSNR)"
$(RMF) $@
$(TNSLSNR_LINKLINE)
tnslsnr: $(S0NSGL) $(SNSGLP) $(NSGLPNP)
$(SILENT)$(ECHO) " - Linking $(TNSLSNR)"
$(RMF) $@
$(TNSLSNR_LINKLINE) -lnnz12 -lons
nano /u01/app/oracle/product/12/dbhome_1/rdbms/lib/ins_rdbms.mk
# change$(ORAPWD_LINKLINE)
# to$(ORAPWD_LINKLINE) -lnnz12
nano /u01/app/oracle/product/12/dbhome_1/rdbms/lib/env_rdbms.mk
# change ORACLE_LINKLINE=$(ORACLE_LINKER) $(PL_FLAGS) $(ORAMAI) $(SSORED) $(TTCSOI) \
$(ORACLE_KERNEL_LIBS) $(LINKLDLIBS)
ORACLE_LINKLINE=$(ORACLE_LINKER) -Wl,--no-as-needed $(PL_FLAGS) $(ORAMAI) $(SSORED) $(TTCSOI) \
$(ORACLE_KERNEL_LIBS) $(LINKLDLIBS)
nano /u01/app/oracle/product/12/dbhome_1/network/lib/ins_net_server.mk
$(TNSLSNR_LINKLINE)
to$(TNSLSNR_LINKLINE) -lnnz12 -lons
Installation Ends
Finally we have finished all the linking errors.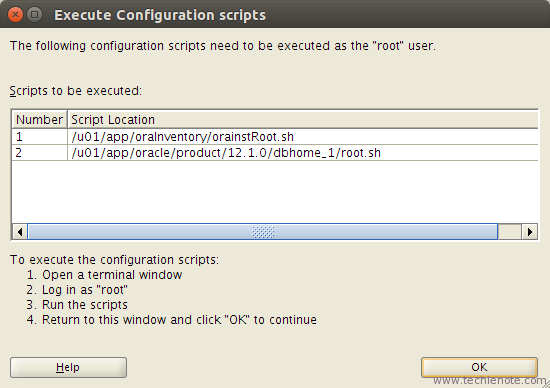
--/u01/app/oraInventory/orainstRoot.sh
--/u01/app/oracle/product/12/dbhome_1/root.sh
Copying oraenv to /usr/local/bin ...
Copying coraenv to /usr/local/bin ...
--/etc/oratab file
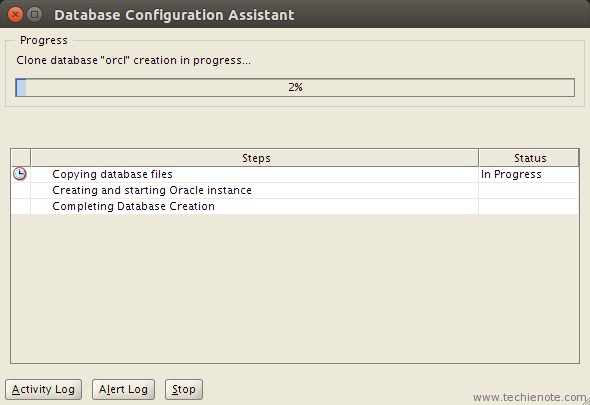
Database Configuration
--wait till end
--EM Database Express URL - https://127.0.0.1:5500/em
--server parameter file - spfileOraSID.ora
--ok
Setting permission
On Database Configuration, there's a link to password management.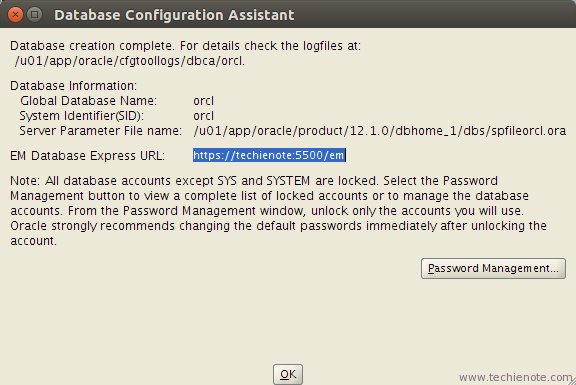
sys system dbsnmp
(mine is nuwan)
Post Installation task
To start listener run following as oracle user$ORACLE_HOME/bin/lsnrctl start
To start database run following sqlplus /nolog
connect sys as sysdba
STARTUP;
EXIT;
Done
Start emhttps://127.0.0.1:5500/em

I can log in as
user sys
pwd nuwan
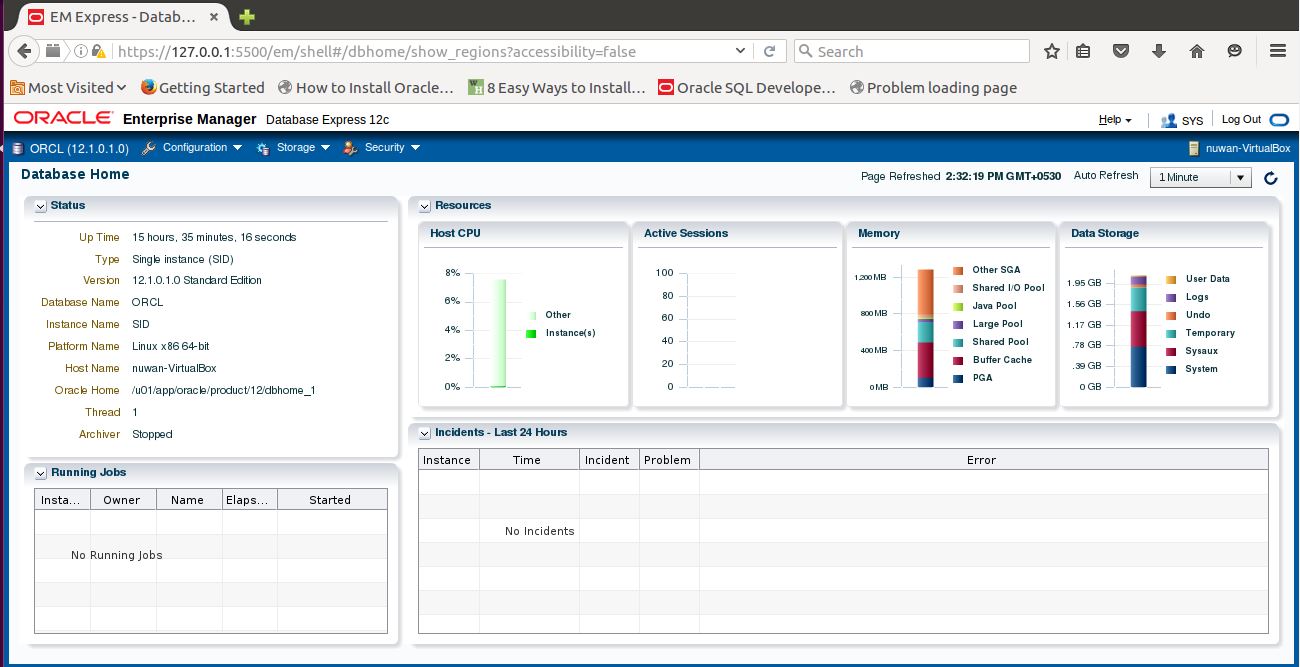
Yes we have completed the installation successfully.